|
 HOME PAGE
 PIXIE
PIXIE DASH FREE 99
These notes are also available on paper from Swallow Systems. They have largely been superceded by the PIXIE playmat and PIXIE grid. Please feel free to use them for non-commercial use in educational establishments.
Many PIXIE users like to use it on a grid of PIXIE-sized squares. This helps children to count how many forwards or backwards moves to make to reach a particular place. The squares also give reinforcement for the idea of right-angle turns.
We have made a lot of grids and this is our method.
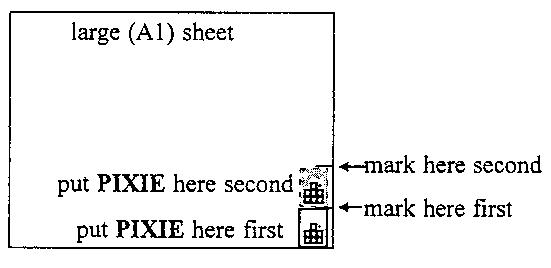
Start with a large sheet of paper or cardboard. A1 is big enough for a 5 by 5 grid, you will need bigger paper if you want more squares. Use PIXIE as a measure for how big the squares should be. Mark PIXIE lengths along two sides from one of the corners of the paper. Now mark along another side from one of the corners next to the corner you started from. (It sounds obvious but I have got this wrong twice already!). Join up the marks with a felt-tip, using a metre rule as a straight-edge.
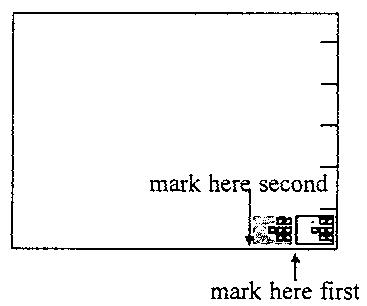
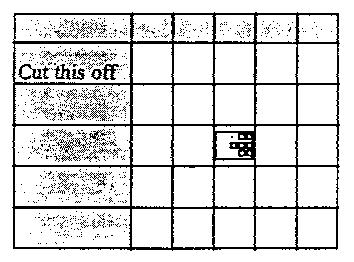
Use PIXIE as a measure along the remaining side and join up the marks again. The paper can now be trimmed to size and the grid is finished. After you fill the squares with suitable pictures etc., you can protect the grid with clear film if you are careful. For a quicker solution, tape the grid to the back of a piece of polycarbonate (e.g. Makrolon) as sold for secondary glazing. Make sure that the Makrolon overlaps the line by at least half a PIXIE-length on all edges otherwise PIXIE will get caught on the edges of the sheet.
This, and variants on it, is my current favourite PIXIE application. The idea is to fill a PIXIE grid with different colours and put matching colours on the six sides of a dice. Children can then throw the dice and find which colour square to go to. As there are several squares of each colour they can select a particular square for themselves.
We have tried many ways to make these grids and most methods take a long time to do. After some research, here is the method we recommend for the most effective use of your time.
Make a grid as described above. Get a set of felt-tip pens, a dice and some white self-adhesive labels. Stick the labels to the faces of the dice. This helps the felt-tip pen ink stay on the dice rather than the children's hands!
Leaving the centre square of the grid blank for now, just scribble in each of four squares with one of the felt-tip pens. Don't try and colour it in neatly; this is where a lot of time can be wasted. You should aim for two of the squares of any row to be the same colour. This ensures that you don't have one row or column with each colour in it. If the children can nearly always get to a desired colour just by going backwards and forwards, they will tend to avoid using turns.
After you have scribbled with a colour, scribble on one face of the dice before you put the pen away.
You will need six colours all together. Black and white can each be used if you are short of colours.
You may prefer to use ready-made colour dice. This is great if you can match the colours on the grid but it can be confusing if you can't. You can also make a grid with coloured paper circles stuck on. This works quite well and looks much brighter. Unfortunately, you will need to cover the grid to protect the shapes. Clear film is difficult to lay evenly over a large grid but it can be done. This option is for teachers with time.
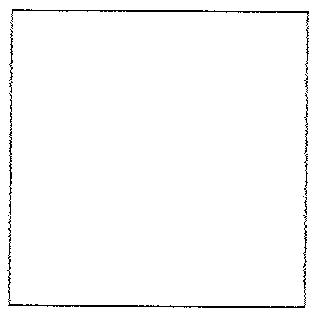
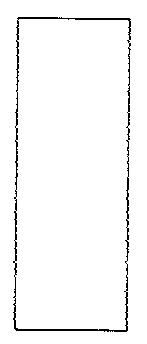
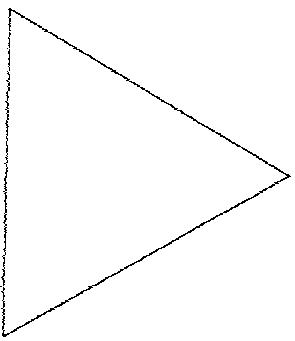
You do not have to stick to colours. If you have more time, you can use shapes very nicely. In our version we made some master shapes for a triangle, square, rectangle, pentagon, hexagon and circle. These were pasted onto card and cut around to form templates. All you need to do then is draw round the shapes with a felt-tip and the game is finished.


You can get shapes dice from many suppliers. In case of difficulty, contact us and we will recommend someone.
If you want the best of both worlds, you can use different colour felt-tips to draw around the shapes. You can then use two dice to specify a particular shape and colour combination. For this to work properly, you will need to have 36 squares making a 6 by 6 grid otherwise you cannot have a different colour on each face of a dice and a different shape on each face of a dice. If you don't have big enough paper for a 6 by 6 grid, mark one face of each dice with * to signify a "don't care". The grid can then be 5 by 5 with five different shapes in each of five different colours.
If you would like the children to match words to colours and shapes, you could try writing the names of them onto the dice. Thus the children have to make PIXIE go to a green square when they roll the words "green" and "square" on the dice. This idea is developed further later in these notes.
The dice could be replaced with spinners.
Add whatever colours, shapes etc. you want and push a cocktail stick through the centre to make the spinner.
If you want the children involved in the design, they could make silhouettes or stencils and use these for filling in the grid. This would work well with words on a spinner.
The basic colour game works very well but the tasks become repetitive. All problems can be solved by a move, followed by a turn, followed by a move. The longest sequence that is necessary is only three types of instructions.
You will find that the tasks are more difficult when PIXIE is facing you rather than facing away. This is the classic problem of left and right looking different when someone faces you rather than when they face away.
There are various ways to make the tasks more complex. The best way we know is to make some of the squares unusable.
An easy way to do this is to mark squares that cannot be used with a playing card. As PIXIE should not go over the cards it will not be upset by them.
The simple version of this extension is for the children to put a playing card on the square that PIXIE stopped on. Obviously you cannot do it until PIXIE moves off on its next task!
The children should try and fill in as many squares as possible. They are very unlikely to manage to fill them all in but they should be able to cover most of them if they develop a good strategy.
Don't be surprised if they find it difficult. The complexity of the tasks increases very quickly as cards block routes on the grid.
The rules for this are shown here.
This type of cooperative game is good but lacks the edge of a competitive version. Worksheet 2 has the rules for a multi-player competitive version. The strategies involved vary from a simple "fill in the centre first to make life difficult" to a sophisticated "If PIXIE is upside-down from where he sits, he might get it wrong".
Much older children find this game challenging. Simple problem-solving becomes a task with strategic considerations.
Here are the rules for the most complex version.
These ideas were prompted by an unknown teacher at a conference for parents of autistic children. Many thanks!
PIXIE grids don't have to be two-dimensional. If you have very young or special-needs children, you may find that a grid is too difficult to start with.
It is simple enough just to have a line of PIXIE-sized squares for PIXIE. The only instructions needed are how many forwards or backwards moves to go to get to a particular square.
The squares can have much more exciting things than colours in them. The teacher who came up with the idea, suggested photos of family members. This may not work in school, but photos of staff and pupils might make a good way to ensure that children can link names and faces.
The work in making one of these "picture lines" may not be justified unless it can be made flexible so that it can be used over and over again. I recommend that the line is made on white paper marked out with black squares. This is covered with a piece of Makrolon secondary glazing.
The pictures are simply placed on the line and covered with Makrolon to keep them in place. You may need to tape the Makrolon down to stop the children moving it. Make sure that the Makrolon overlaps the line by at least half a PIXIE-length on all edges otherwise PIXIE will get caught on the edges of the sheet.
There is a problem with some types of material. The adhesive that keeps a protective sheet on the plastic leaves a residue that upsets PIXIE when moving backwards. I solved the problem by cleaning the plastic with furniture polish.
Alternatively, you could use one line of the PIXIE grid with pictures behind it and leave the rest of the grid blank.
You can use the same dice ideas with pictures as I described earlier with colours and shapes. Instead of dice you could use flash cards with the names of the pictures on. This is much like a first reading book but it has more motivation behind it.
Pictures are much more interesting and complicated than colours and it is a good idea to take advantage of this. My suggestion is that you have flash cards with adjectives on them. The children take a card and then have to make PIXIE take the card to a picture with that attribute. For "tall" they could choose a giraffe. For "hairy" they could choose a dog. For "small" they could choose a bee.
If the pictures are on a line rather than a grid, they can pile the cards up next to the picture and end up with descriptions of the pictures.
Sometimes you may find that the children use the game as an excuse for fun. Pictures of the staff may be used with the same adjectives as the animals with amusing results.
You may find that using the latest fad stickers or cards as the pictures helps to generate interest and excitement.
Some schools have PIXIE in several classrooms. If you find yourself in this position, you may like to arrange to have several PIXIEs in the same classroom occasionally. If you get the chance you should take advantage of the possibilities and let the PIXIEs interact.
As long as you keep the movements small, PIXIEs will stay in step with each other. If you put the same program into all of them and press Go at the same time on all of them, they will do "synchronised dancing".
The trick to synchronism is to realise that PIXIE does not move until you release the Go button. If they are reasonably close together you may be able to start two with each hand. If each PIXIE is programmed and started by a different child you will find that they need strategies for getting the PIXIEs to start together. 1-2-3-Go is good enough as long as they realise that they need to take their finger off the button quickly.
The children will also need strategies to ensure that the programs are the same. This is where a written program copied into each is a good idea.
Children will find that the PIXIEs have to start a little distance from each other. If they start in a line alongside each other, they will bump into each other when they turn.
There are at least two good ways to introduce these ideas. Depending on your pupils and your own ideas, we recommend "folk dancing" or "Red Arrows".
For folk dancing you can give PIXIE a face by sticking coloured spots on its front or by making a cover along the lines of the witch in volume one. With coloured labels, use large white circles with small blue, green or brown circles on top.

The folk dancing step I recommend is a Do-Sa-Do. In this two PIXIEs have to dance around each other passing each other going forwards and backwards.
The effect can be improved a lot by making PIXIE turn in 45o increments. With PIXIE turning in 45o increments, this program does the trick:-
Use two PIXIEs and set them up about 4 PIXIE- lengths apart. You might like to add an extra flourish at the end. One group had the robots "kissing" after the dance.
"Folk dancing" can be extended to use all the PIXIEs you can get. The patterns for a Dorset forehand reel might make an interesting challenge.
For "Red Arrows" use several PIXIEs dressed up as "Pete the PIXIE Pilot" from Volume One. If you photocopy them onto different coloured sheets you can have a "Blue Leader", "Red Leader" etc.
Now you can program them to carry out the two-dimensional equivalent of a formation flying team. These patterns can be quite complicated.
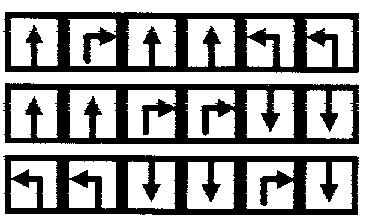
In general, the planes will carry out different programs. For example; a "starburst" with three aircraft will have one going straight on, one turning left and one turning right.
The geometry of these activities is fairly straightforward. The thing that makes life interesting is that the PIXIEs have to miss each other even though they are going over the same ground.
The activities add TIME to the normal parameters of SHAPE and SPACE.
Most people will leave PIXIE set to 90o turns. This is a good general-purpose angle but, with older children, the mathematics of angle can be looked at in more sophisticated ways.
90o turns force you to divide space according to rectangular coordinates. You can get anywhere by going forwards or backwards the right amount, turning a right angle, and then going forwards or backwards again.
This is a convenient and conventional way of looking at the world. Unfortunately, this does not give the shortest way to get between two random points.
If you have a finer turn resolution than 90o, you have more choices. Using 45o or 30o you may be able to make PIXIE turn to point to where you want to go and then go straight toward the target. This is obviously quicker than using the rectangular coordinate system.
With PIXIE you can only have multiples of 5o but this will normally be enough provided that PIXIE is used in a small space.
Dividing space into rectangles has some side effects. A PIXIE grid shows the problem. For any square there are eight adjacent squares. Four of these are one PIXIE-length away. The other four are about 1.4 PIXIE-lengths away.
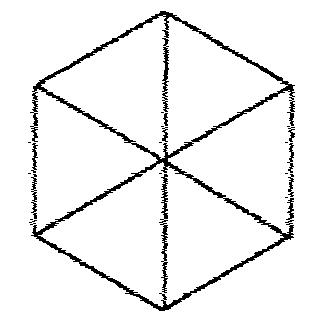
This is a problem for some board games and is usually solved with a hexagonal grid.
Hexagons divide space up evenly and the centres of the hexagons are uniformly spaced. You always move the same distance when you go between two adjacent hexagons.
If you want to try hexagons, you should set PIXIE to turn in 60 degree increments. A single turn will make PIXIE face the next hexagon round.
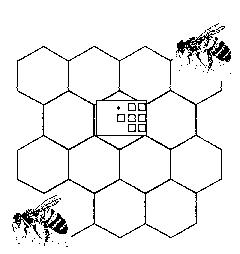
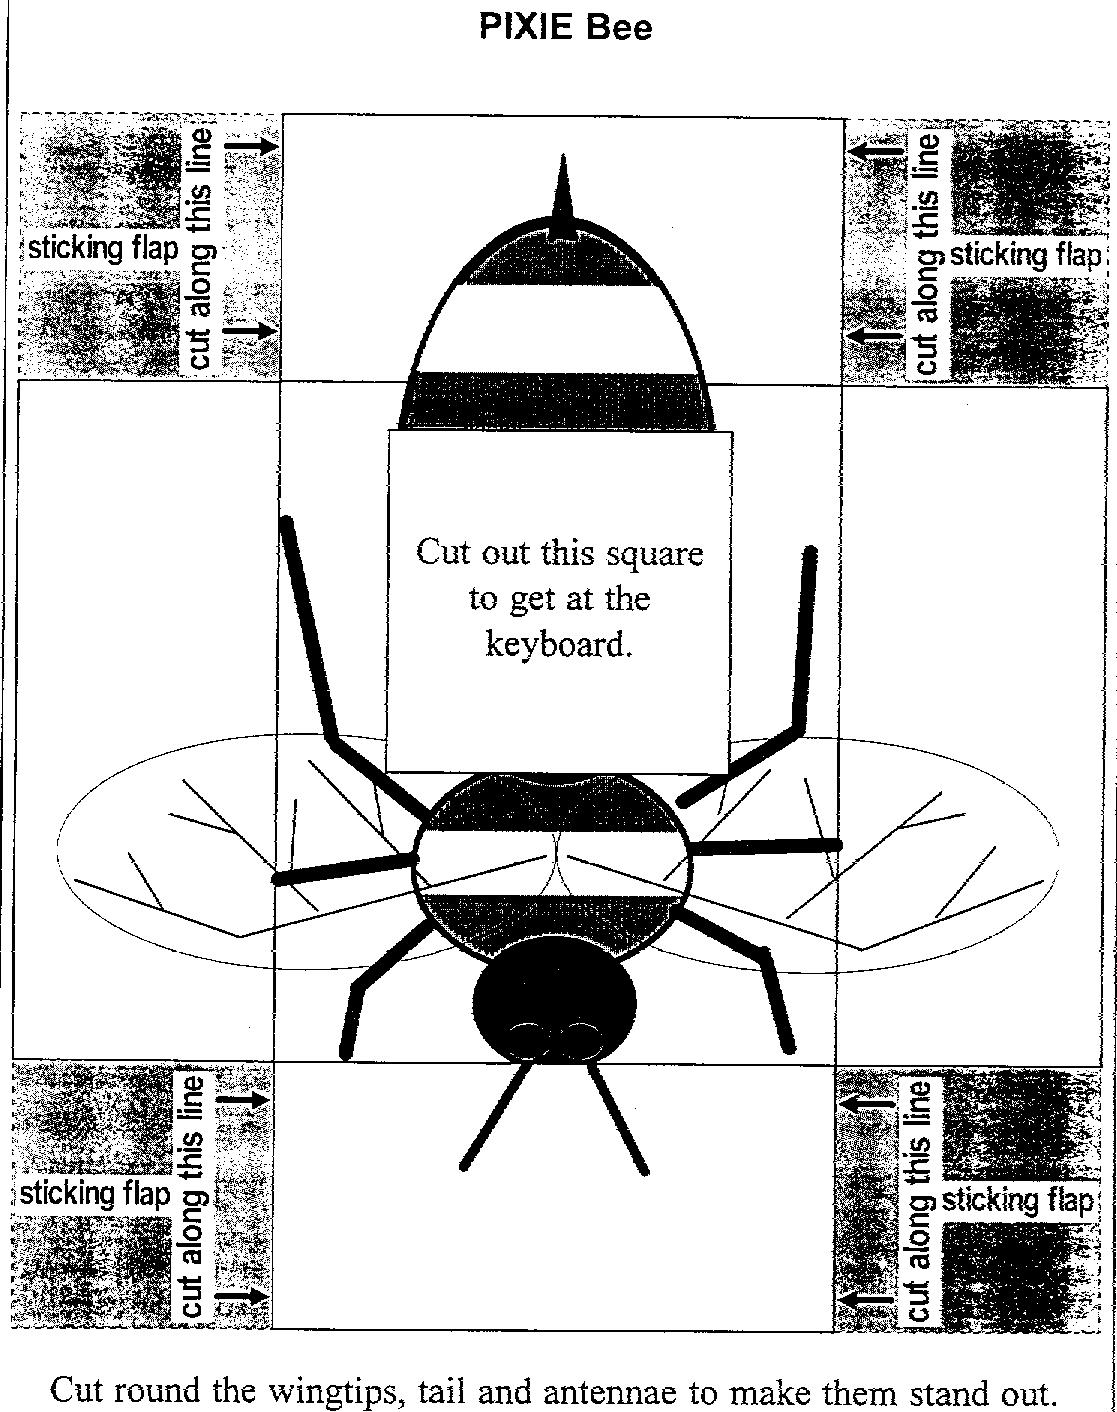
To take advantage of the hexagons, use PIXIE dressed as a bee. The contents of the hexagons can be anything that you would use in a normal PIXIE grid. I fancy using letters and having a "spelling bee". Here is a link to a jpg file of the bee cover. You will probably need to adjust it in a drawing package to make it fit.
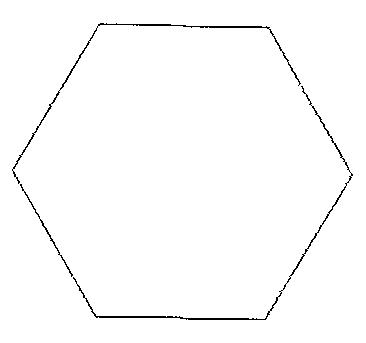
Making a hexagon grid is not easy. The only satisfactory way I know is to keep drawing around a hexagon stencil. Here is a link to a jpg file of a hexagon. You will probably need to adjust it in a drawing package to get the correct size. The line shown should be 100mm long.
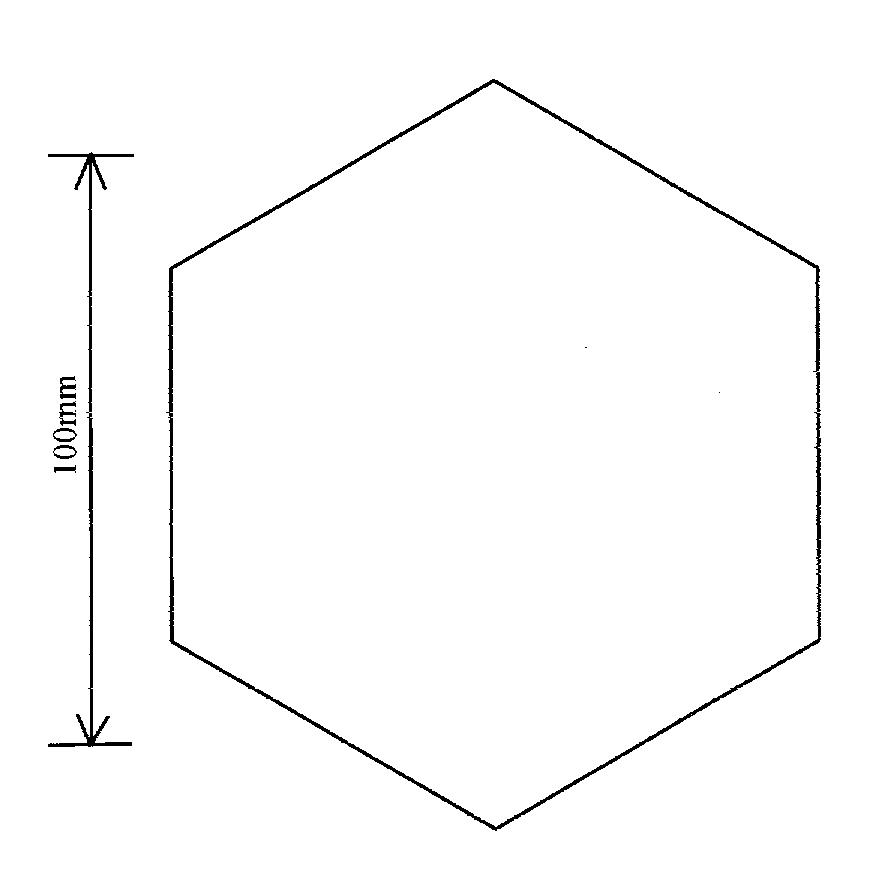
Here are 4 recipes for changing PIXIE unit sizes.
Sequence Problems
Some children (and adults) find it very difficult to grasp the concept of programming PIXIE now to make it do something then. I have no total solution to this but here is an idea I have used with some success.
Draw a large arrow on a piece of card. A blank playing card is ideal. This is used as a dummy PIXIE. If you want to make a posh version, simply photocopy the top of PIXIE itself.
The way to use this dummy is to press CM on PIXIE and then the first button of the program list on PIXIE. The dummy is then moved or turned to represent where PIXIE will be after it has executed the instruction.
This is repeated for the whole list until the dummy ends up where you want to go. When you press Go on PIXIE it will then trace out the path that the dummy followed and end up on top of the dummy.
This idea only needs to be used for a very short time to enable children to grasp what is going on. I normally find that only 5% or so of users have any need for this idea and it nearly always solves the problem very quickly.